
Short answer: to show your online store’s products on Google Shopping and in Shopping ads, you need a Google Merchant Center account. Signing up is free and takes 20-30 minutes: you add your business details, verify your website, set up shipping and returns, and then connect a product feed. Google reviews your products, and approved ones can appear for free or through Google Ads.
I’ve been setting up and managing Google Ads for more than 9 years, and almost every ecommerce project I work on starts with Merchant Center. Below I walk through the whole process step by step and point out where people usually get stuck.
What Google Merchant Center is and why you need it
Merchant Center is where your product data lives: titles, prices, availability, images and shipping. Google uses that data to show your products:
- in free product listings on the Shopping tab and other Google surfaces;
- in Shopping campaigns and Performance Max in Google Ads;
- in local inventory ads, if you have physical stores.
You can’t run Shopping ads without Merchant Center. A Search campaign shows text, while a Shopping ad shows a product card with an image, price and store name. For many stores, that’s the main source of sales from Google.
What to prepare before you sign up
To keep setup from dragging on for a week, check your website first. Google compares what you enter in Merchant Center with what it sees on your site, and any mismatch leads to problems.
Your website should have:
- a working cart and checkout;
- real contact details: phone, email, and an address or at least a city;
- pages with shipping, payment and return terms;
- a privacy policy;
- product prices in the same currency you’ll use in the feed;
- a secure connection (https).
If anything on this list is missing, fix the site first. It saves you time dealing with “misrepresentation” restrictions, which I cover below.
How to set up Google Merchant Center: step by step
Step 1. Create the account
- Go to merchants.google.com and sign in with the Google account that will own it. I recommend a company work email rather than an employee’s personal address.
- Enter your business name exactly as it appears on your website.
- Choose the country where your business is registered and your time zone.
- Select where you sell: online, in physical stores, or both.
- Enter your website URL.
Step 2. Fill in your business info
In settings (the gear icon), open the business info section. Add your address, phone number and customer service contacts. Google may ask you to verify your phone with a code. Your address and phone should match what’s on your website.
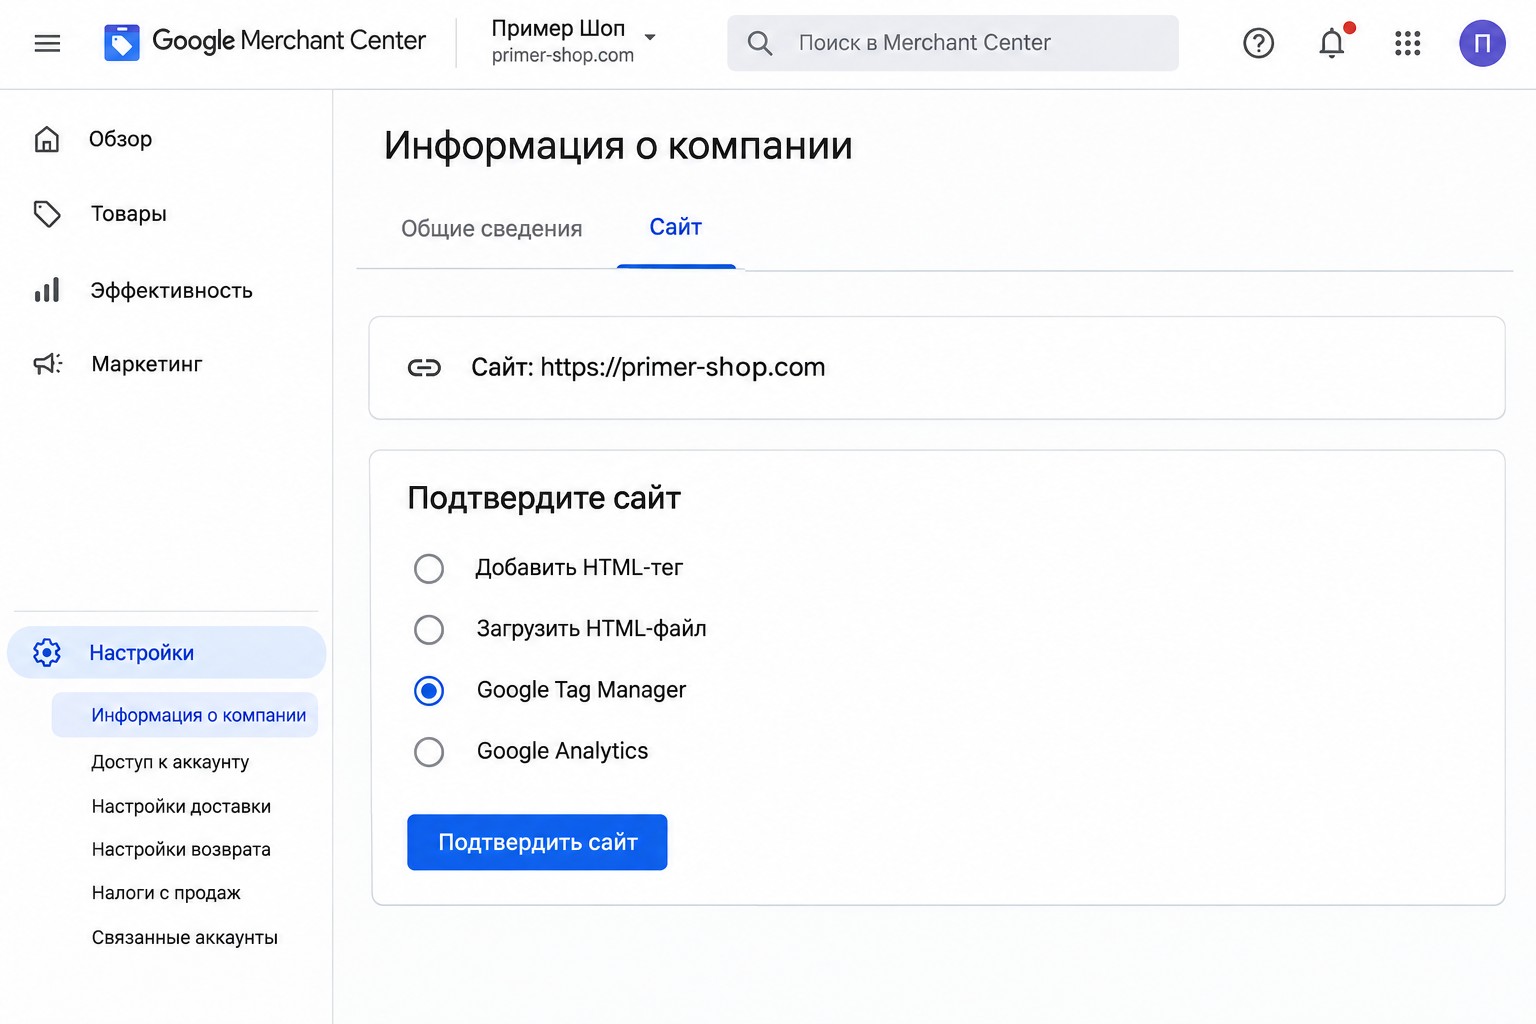
Step 3. Verify and claim your website
Google needs to confirm that the website belongs to you. Verification options:
- An HTML tag in your homepage code.
- An HTML file uploaded to your site’s root folder.
- Google Tag Manager, if the container is already on the site and you have access to it.
- Google Analytics, if you have admin rights.
- A platform plugin: on Shopify, WooCommerce and other platforms, verification often happens automatically.
If Google Tag Manager is already installed on your site, that’s the easiest route: one-click verification, no developer needed.
Step 4. Set up shipping and returns
In settings, find the shipping and returns section. For shipping, specify:
- the countries you ship to;
- order handling time and delivery time;
- the cost: flat rate, free above a certain order value, or based on weight or price.
Set your return policy in the same place: the return window and a link to the page with your return terms. Without these settings, your products may not show at all or may show with incomplete information.
Step 5. Add your products
This is the key step. You add products in the “Products” section: click the button to add products, then choose a data source. All connected sources then appear in settings under “Data sources”.
Ways to upload a product feed
Merchant Center can receive your products in several ways. The right one depends on your catalog size and your ecommerce platform.
Connect your store platform
If your store runs on Shopify, WooCommerce, PrestaShop or another popular platform, the easiest option is the official plugin or app. It sends your products and keeps prices and availability updated. I always choose this option when it’s available: less manual work and fewer mismatches.
Scheduled file fetch
The classic option: your CMS generates an XML or TXT feed at a permanent URL, and Merchant Center fetches it on a schedule, usually once a day. This works for most custom-built sites. Make sure the feed URL never changes and opens without a login.
Google Sheets
Good for small catalogs of up to a few hundred products. Merchant Center gives you a ready-made template with the right columns, and changes sync automatically every 24 hours. The downside: you update prices and availability by hand, so sooner or later the sheet will drift out of sync with your site.
Automatically from your website
Google can find products on your site on its own if your product pages use schema.org structured data. It’s a convenient start, but it gives you less control over the data. I use it as a supplementary source and keep a feed as the primary one.
Merchant API
For large stores with frequent price and stock changes: products are sent programmatically. This is a job for a developer.
Which attributes your feed needs
Required for all products:
- id: a unique product code;
- title;
- description;
- link: the product page URL;
- image_link: the main image URL;
- availability;
- price, including currency.
Most products also need brand, gtin (the manufacturer’s barcode, if one exists) and condition (new or used). Apparel also needs color, size, gender and age group.
I also recommend filling in product_type (your own store category) and custom_label_0-4 (your own labels: margin, season, bestsellers). Without them, it’s hard to split products in your ads later. I explain this in more detail in my article on Google Ads account structure.
How to write a product title
The title in your feed works like a keyword: Google uses it to decide which searches to show your product for. A good formula is brand + product type + model + key attribute (color, size, volume). Don’t put “SALE”, “best price” or all caps in titles: products like that get disapproved.
Product review and diagnostics
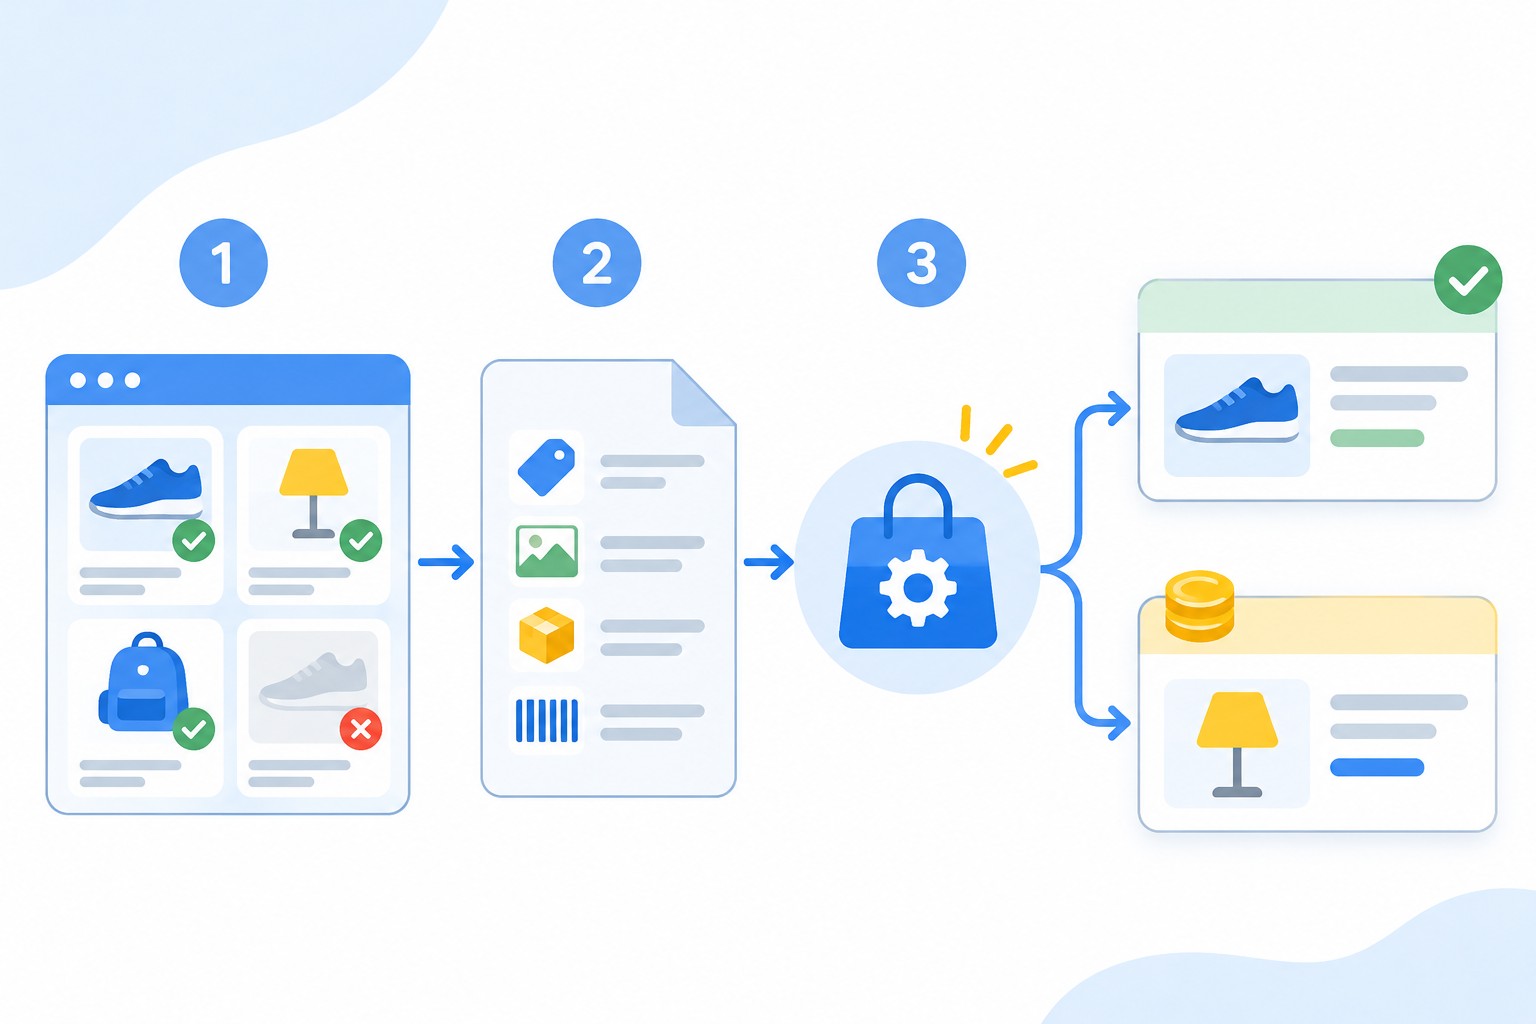
After upload, Google reviews each product. This can take anywhere from a few hours to 3 business days. Product statuses and issues are shown in the “Products” section, where Merchant Center separately lists products that need attention and explains what’s wrong.
Issues come in two types:
- errors: the product won’t show until you fix them;
- warnings: the product shows but may perform worse.
Check diagnostics at least once a week. Prices change and products go out of stock, and if your site and feed don’t match, Google first disapproves individual products and, with repeated mismatches, may restrict the whole account.
How to link Merchant Center to Google Ads
- In Merchant Center, click the gear icon and open settings.
- Go to the access and services section, then the “Apps and services” tab.
- Click to add a service and choose Google Ads.
- Select your Google Ads account and confirm the link.
If you’re an admin in both Merchant Center and Google Ads, the link is approved automatically. If not, accept the request in Google Ads: the “Tools” menu, “Data manager”, the connected products section, Google Merchant Center. It’s also worth setting up analytics so you can see what shoppers do after the click; my analytics setup service covers exactly that.
Once linked, you can launch a Shopping campaign or Performance Max with your products. I explain how the second option works in my Performance Max setup guide.
Common mistakes when signing up and uploading a feed
- The feed price doesn’t match the website price. The most common reason for disapproval. Usually the feed updates too rarely, or a discount on the site never made it into the feed.
- No contact details or return terms. This leads to an account restriction for misrepresentation. You can fix it, but you’ll have to wait for a re-review.
- Wrong language or currency. The feed language has to match the language of the pages it links to. If they don’t match, products get disapproved.
- Images with text, watermarks or borders. The main image should show the product itself on a clean background.
- The feed URL changes or requires a password. Then Merchant Center can’t fetch it and your data goes stale.
- Out-of-stock products marked “in stock”. It frustrates shoppers and leads to disapprovals.
Frequently asked questions
How much does Google Merchant Center cost?
The account itself is free, and so are free product listings. You only pay for Google Ads if you run Shopping campaigns or Performance Max.
How long does product review take?
Usually from a few hours to 3 business days. The initial website review can take longer, especially if Google finds issues with your contact details or terms.
Can I skip the feed and rely only on products found on my website?
You can, but I don’t recommend it as the main method for a store with more than a few dozen products. With a feed, you control titles, categories and custom labels, and that directly affects your ads.
Why was my account restricted for misrepresentation?
Usually Google doesn’t trust the website enough: there are no real contact details, return terms or company information, or the prices and claims look unrealistic. Fix the site and request a re-review in your account.
Do I need a separate account for each country?
No. One account can sell in several countries: set up shipping for each country and a feed with the right language and currency.
Conclusion
Merchant Center is the foundation of ecommerce advertising on Google. Prepare your site, fill in your business details honestly, set up shipping and returns, connect a feed through a plugin or a scheduled file, and keep an eye on diagnostics. The cleaner your feed data, the cheaper and more stable your ads will be.
If you’d like me to look at your Merchant Center and ad account, request a free express audit: within 2 days I’ll tell you what’s keeping your products from showing and selling. For practical Google Ads and analytics walkthroughs, subscribe to my YouTube channel.